Posts

Showing posts from January, 2007

Eclectic Academy Making your Photos Pop Lesson 3
Image
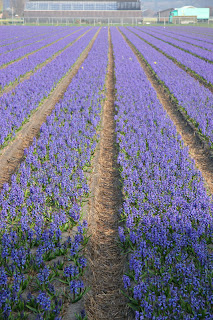
Flowers Before: The photo of the field of hyacinths was taken early Easter Sunday Morning 2006. The hotel we stayed at was surrounded by flower fields. This is the uncorrected photo. The only change was to resize it for the web. Shoe Before: The bus took us to a cheese and wooden shoe factory. Again, this is the uncorrected photo. The only change was to resize it for the web. Combined Photo: I used the clone tool to move Karen into the field of hyacinths, then used the clone tool again to copy flowers over the edge of the shoe. Both photos where corrected using levels prior to the cloning. The flowers were also cropped. Butterfly Garden Before: This was taken last year at a butterfly garden near Guelph, Ontario. The photo is uncorrected. Butterfly Garden After: I played with levels, dodge, burn and finger painting.

Eclectic Academy Making your Photos Pop Lesson 2

Image
This is a bench in the garden at Leeds castle prior to any corrections or manipulations: This is the photo straightened (Vertical using the back leg of the bench and horizontal using one of the back split rails). Then the photo was corrected using levels" Bench moved to B&W using highlights and shadows method: Bench moved to B&W using threshold method: I liked the highlights and shadows method better. I like the bench better using that method.

Eclectic Academy Making your Photos Pop Lesson 1

Image
I've posted my photos twice to the photo site I usually post to and so far they haven't shown up so I'll use the blog instead. Quick Edit The first picture was taken in the wine cellar at Leeds Castle in England. I used smart fix auto, then darkened the highlights and midtone contrast to get this after photo: Before leaving Quick Edit, I tried the sharpen section and got this: Standard Edit The first standard edit photo is taken in Amsterdam First I straightened the photo. Then it was cropped to get rid of the blank space from straightening. Next it was sharpened using sharpen more. Duplicated the background layer and used Screen 20%. Selected the sky with magic wand (both layers) and made a sky layer. Used Linear burn. The resulting photo was this one: I re-opened the jpeg and selected the sky onto another layer and tried auto correct on the sky. I think it pushed it too far: Finally I played with a picture from the town of Ypres: This is the Be...